Colouring by vector / colouring in Paintshop Pro 2
![]()
Got the outline? Then it's time to colour!

Step 6
Now it's
time to change layer again. Go to Layer 2 - Colour Layer.
Now, I
usually prefer the paint brush, but I'll be nice to you and tell you to use
the fill tool, which will save you a little time.
As I said, choose the
fill tool. Change the colour (last time I'm telling you: middle left box under
Styles. Just click on it and choose colour). I chose brown. You can choose any
colour you want, of course.
Make the options like
below:
Blend Mode: Normal
Match Mode: RGB Value
Tolerance: I
don't know... I began with 115, but that might be too high
Opacity:
100
Sample Merged
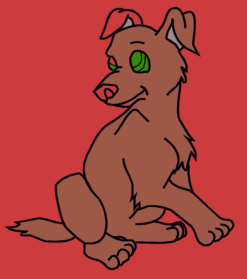
Use the fill tool as much as you can, colouring the pic as any normal pic. Make sure that you are on the Colour Layer!!!! You might accidently colour the background as well. That must be fixed! Otherwise, you won't be able to make a background later on!!! You can either choose Edit > Undo, or use the Eraser (looks like an eraser on a pencil).
![]()

Step 7
You might
not be able to colour every part of the dog with the fill tool. I couldn't on
the pic above, at least not without colouring the background as well. You can
change the tolerance (to a lesser number) but that might not be enough: your
pic will still have little red spots on it (especially around the outline -
you can see it if you zoom in on the pic). The reason we made such a ugly
background is so that we could spot miscoloured areas of the pic. It's harder
with a white background, and if it was too dark we wouldn't see the vector
part of the image very well, since it's black. It doesn't have to be red - but
it should be a solid colour.
Now, choose the paintbrush
instead of the fill tool. I have always preferred the paintbrush over the fill
tool - it gives you more control over the colouring. Don't forget to change it
to a small enough size though ;) You can also change the hardness to 100, and
check the Show Brush Outline box - that will make it easier using the
paintbrush for this kind of colouring.
Don't be afraid to draw on the
outline - because it's in a higher layer, it won't be changed. If you draw
outside the outline, however, I recommend using the Eraser or Undo. Otherwise
it will look ugly if you want a background later on!
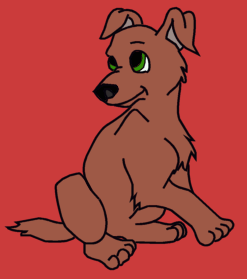
Colour all of your
pic, but don't bother about shadows and highlights. Not yet, anyway. We will
make them later!
![]()

Step 8
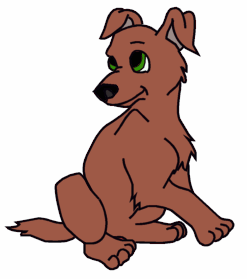
Now we can
remove that poor excuse for a background... Go back to Layer 1, and choose the
fill tool. Change the colour to any of your like. I chose white. A background
can now be added. But in this case, I'll wait. You can draw a background in
the 1st layer if you want. It'll be placed behind the pup automatically, cause
it's part of layer 2 and 3, not 1. Get it? If you don't, don't worry
about it :)
![]()

Step 9
Now I'll
teach you how I add highlights etc in the eyes... This is quite fun, but you
need to work with small details, and patience is necessary...
Go back to the colour layer, and
zoom in until you have a good view of the eyes.
Choose the Retouch tool (it
looks like a hand) and choose the Darken RGB tool. Make it quite small, like
size 5 or something, and make the options:
Hardness: 0
Opacity:
28
Step: 25
Density: 100
Now draw a dark line in the top
of the eye. Why the top? Basically, that's where the shadow fall, so it should
be dark. For extra effect, you can draw another line in the bottom of the eye
as well, but I won't bother.
When you're done with that, do the same with
the Lighten RGB, although in the middle of the eye.
Sometimes, the result
might look a bit weird. You can use the smudge tool if you want, it might
help. Remember to keep it very small though, or it will smudge with the rest
of the pic's colour as well!
Now, go back to the Vector
Layer. Choose the Preset Shapes Tool (it looks like a rectangle and a circle).
Make sure that both the foreground and background colour is white. Uncheck
the retain style box, if it's checked.
Now, draw a circle in the
eye. This will be the highlight :) Make sure that it's antialias and
created as vector! You can choose the Object Selector and make the circle
larger or smaller... Don't make it too large though!
If your highlight is
placed on top of the outline of the eyes (which we don't want) use the Object
Selector - click on the highlight, then right-click on it and choose Arrange
> Send to Bottom. That'll teach it a lesson ;)
Now it's just the last details left... Go to Page 3!
![]()