Colouring by vector / colouring in Paintshop Pro
![]()
Okay. You want to draw a image with vector lines in it? I'm warning you! This is my longest tutorial! You will need patience, interest and at least some experience with computer colouring. Think you've got what it takes? Then let's give it a try, shall we?
What you need:
|

Step
1
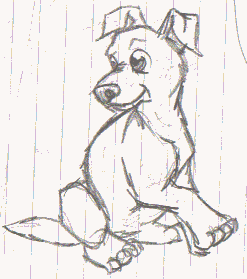
Okay. You have scanned a picture. Here's mine. You don't need to ink
it, but a clear outline will make it easier for you.
First, make sure that
your picture supports 16 million colours. Click at Colours > Increase Color
Depth > 16 Million Colours (24 bit)
Click on Layers > New Raster
Layer.
Don't change any of the options. If you already have, they should
stand on:
Blend Mode: Normal
Opacity: 100
Group: 0
Layer is
visible
Mask is enabled for this Layer
Mask is locked with layer
Name
the layer "Colour Layer". This is not necessary, but it will help us keep track
of the layers in this tutorial.
Now, click on New Vector layer. Don't change
anything here either, just name the layer Vector Layer.
Vector layers aren't
like normal pictures in PSP. You can't use the paint brush and the other normal
tools. Instead, you use a tool called Draw. With it, you draw vector lines. Ever
used the connected line-drawing tool in MS Paint? Then you have drawn the same
type of lines before. Vector lines are different though, because they can be
changed afterwards if you're not happy with them.
![]()

Step
2
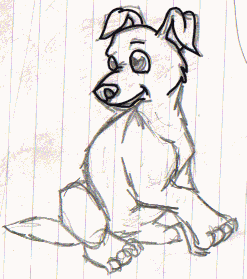
Now comes the vector drawing itself. This takes time and practice. At
least, it did for me. It took a while before I was happy with the result, but
how can you become better without trying? Training is the key to
success.
Make sure that you are on the vector layers.
You check this by clicking on Layers in the menu. It should be a little check at
Vector Layer.
Click on the Draw tool. It looks like a pencil drawing a
curved line. A window called Tool Otions should pop up. If it doesn't, click on
View > Toolbars, and make sure that the Tool Options Palette is
checked.
There are many options to choose from when
drawing with vector. For now, choose Freehand in the list, width 2, line style
#1 solid. In the colour menu, choose black in the left box, and choose null in
the right. It should look like below.
When you
have done that, it's time to draw! Press down the left button on your mouse, and
dry drawing a line (keep the button pressed) and then release when you are done.
A vector line! Choose Edit > Undo to get rid of it.
Draw a few lines,
following the sketch. It's hard in the beginning (at least, it was for me) but
keep trying!
![]()
|
Before... |
After... |
|
|
|
Step 3
What if something goes wrong? Well, you can always
choose Edit > Undo. But there is also another way... Click on the Object
Selector (a square with the mouse arrow in the middle).
Click on the
vector line that turned out wrong to select it. Now, right-click on it and
choose Node Edit. Remember, as long as you are in the Node Edit mode, you can't
switch to another mode - that will close the Node Edit. You can still go back to
it later, though.
Now you should be able to see
little squares and thin lines, right? These are the base of your line, the
skeleton, so to speak. You can move the squares around, and see how the line
change. If you click on them, there might also be little arrows. You can click
on the head of these arrows, and by pulling them this way and that, the line
change too. If there aren't any arrows, you can add them yourself. Right-click
on the square to which you want to add a arrow, and choose Node Type > Curve
Before/Curve After. Mess around until you fix the line. There are other Node
Edit tools as well, but we don't need them now, so I'll leave it to you to
discover them by yourself :)
If your line looks even worse after being
edited, just choose Edit > Undo.
Remember! Practice makes
perfect!!!
![]()

Step 4
Keep working
on the outline!
If you look closely at this pic, you can see that I
didn't follow the sketch exactly - for example, I made the hind leg bigger. You
don't have to follow everything like a slave, just draw like you want. Also, I
made the line in the eyes thinner. You can fix that by changing the line width
to 1 instead of 2. You can also use the Object Selector. Click on the line, then
right-click and choose Properties. You can change lots of other handy stuff
there - try some different things :)
Also, you might notice that I didn't
draw the highlights in the eyes. Don't bother about them - they will come
later!
Also, you can also draw the whole outline by using the Point-to-Point line style. I use both, and it's hard to say which is easiest. Using the Point-to-Point is almost exactly like using the Node Edit. Instead of holding the mouse down, you click where you want to place the little squares. Unless you use the arrows, your pic might look very "stiff" with sharp edges, if you use the P-t-P. I usually use it only for small details or real hard to draw-stuff. It does give you more control over the lines.
![]()

Step 5
Now comes some
more fun stuff! Click on Layers, and choose Layer 1 - "Background". This is the
layer with the sketch, remember?
Now, change the colour in the Color Meny.
Change the background colour (the box in the middle to the right, under Styles)
to Solid, and choose a colour. Let's take red.
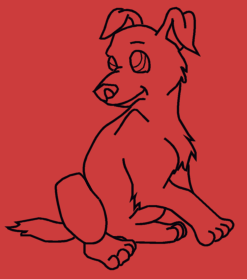
Now, click Edit > Cut. The
sketch should now be gone, and you'll have a black outline of a pup (or whatever
you drew) and a hideous red background ;)
Look at the outline. It's easy to
forget to connect lines with each other or make them too long. Go back to the
Vector layer (this is the last time I'm telling you *grin* Layers > Layer 3 -
Vector Layer) and use the Object Selector to change everything like you want
it.
![]()