Petz into Picz
![]()
Okay, I will now give an example
of how you can use a petzpic to draw a picture of your pet.
Petzpix are great, because not only will they give you a good (well, sometimes
anyway) pose but you will also get a pic that shows you proportions, colour etc
of the pet. Okay, so what do we need? I used a normal copy paper and a pencil
with a 0.7 tip. Lemme see.. It's called Pilot Super Grip 0.7 (man, what talk
about bragging.. Super grip, yeah right! Pilot does make nice pencils though...)

Step 1
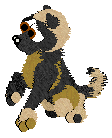
Okay, this is the pic I'm going to use! The pet is the german shepherd pup
NB's Calico, named after his unusual colouring. I chose thic pis partly because
of the cute pose, partly because of Calico's unsual colouring. German shepherds
aren't coloured like that... But can I make it look natural? Okay, what do we
have? A suprised pup, that's what. What's more, it's a shepherd pup. What are
shepherds pup like? Slow, fat and stupid? Nope, they're fast, sleek and
intelligent! So that's something we'll want to capture. But, since it's a pup,
it should also be cute. Hard task? Not really! Just use the petzpic as
reference!

Step 2
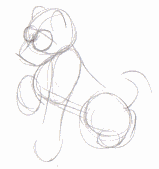
Here we go! Here I've drawn circles to help me place the body parts right.
Note the turned head, the lifted paw and the bent hind legs.

Step 3
Basically, I've continued to work on the outline here, adding eyelids,
pupils, nose, toes etc. It's not all that hard. Just keep looking at the
petzpic, and try to draw like it looks there. It might require some practice.
This is my first real try at doing this, although I've had it in my head for a
while!
Especially notice the bent knees and the confused look on the face!

Step 4
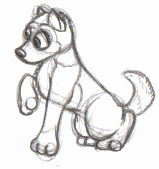
Here I've continued to work on the outline, and I've added a lot more
detail, such as more fur on the tail, some help lines for the colouring etc. Two
notes here. First off, you might notice that the ears and face look slightly
different from the petzpic. Well, I went for a more realistic look. Two eyes
right next to each other would take away from the puppiness, and I'd rather have
3D ears than flat flags glued to the head :) Second, I aimed for a slightly more
realistic colouring. It's basically the same, but I softened a few lines to make
it look more natural. You can especially see it on the frontleg. In fact, the
whole pic has been changed to look a little more realistic. The dog is longer,
with smaller eyes and slightly different proportions, such as a smaller head.
Well, as long as you can still tell it's the same pet, I don't think it really
matters. Everyone has their own drawing style - develop your own :)


Step 5
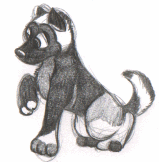
There you go! All finished :) Sure, some details are different, but like I said,
I wanted to a slightly more realistic look. The keywords are
look-at-the-petzpic. Basically, you can get all the help you need there! Start
by defining the basic shape using balls and circles. Move on to the outline, and
then details. When everything looks EXACTLY like you want it (well, as close as
you can get!) you can ink/colour the pic and call it a finished masterpiece :)
![]()