Drawing a realistic dog (version 2)
![]()
Want help with drawing a random
dog? Well, here's a step-by-step lesson that might help :) I recommend to watch
the pics, read the text, and then draw. At least, that's how I intended the
tutorial to work.
Yeah, this is an updated tutorial version. The old one sucked bad. When I saw
it, I went "OMG! HOW COULD I POST THAT!" So yeah, here's a newer
version ^^; (which I will probably hate in a year or so ;) )
Oh yeah, and remember to sketch lightly! And for the sake of donuts, use a HB pencil! I don't want to see any crayons or markers here... You might want to be able to erase!
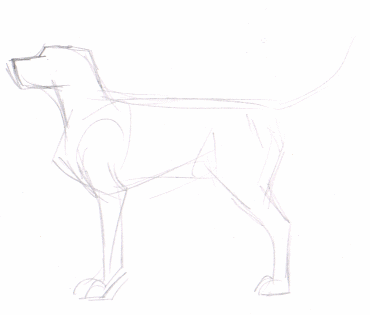
Step
1
First, let's create a basic outline. I've used
helplines as you can see, to help me decide where to place the different
bodyparts This dog is sort of realistic -
I've tried to give it somewhat true proportions. There are some helplines that
could help you when drawing a dog, here, lemme show you:
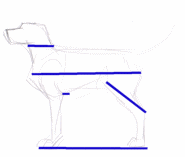
Look at the head / neck.
Usually, the underside of the muzzle is about the same level as the back. This
dog has a quite long neck. Oh, and I better warn you... I know exactly what
each part of the dog is called in swedish - but I don't always know the english
name... Sorry abouth that! I'll do my best :)
Anyway, back to the subject.
Look at the line between the brisket and the thigh. About the same height, see?
Also look at the elbow. It's usually placed in the same height as the chest
line. Those are my main help lines, although you might want to use different
ones if you want. Feel free to!
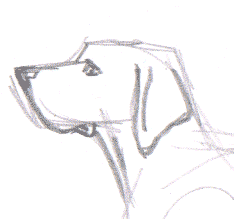
Step
2
Alright, since this is step-by-step... Draw a nose, eyes and ears
on your dog. The eyes are placed rather close to the stop (forehead), are not
all that big and shaped like triangles. They should be placed just a little
little bit above where the dog's muzzle becomes a head instead.. Get it?
The
ears are, in this case, hanging. Make them triangle shaped, too! And draw a sort
of bent line like I've done. That will mark that the ear is 3D, not just
flat.
Now, go on and draw a mouth. It's not that hard. Begin by defining a better, not so square-like, muzzle... Continue drawing a line until you get closer to the throat. Draw downwards, and make a sort of sour expression. That's what dogs look like. Now, add some skin below the mouth, and ta-da!
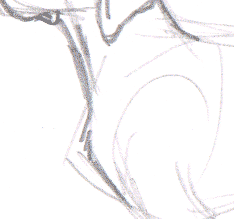
Step 3
Now
we'll continue with the neck and body. Give the dog some loose skin. Could never
hurt. Besides, this is a hound, they often have some loose skin like that.
At
one point, you'll notice (if you've drawn it) that the chest starts to go
outwards. Good. It's supposed to. Dogs have a little bone
there.
Now, let's go to the back. We'll begin at the neck of the dog. Now, all doggies have a lil "bump" there, which is part of the skull, also known as the occiput (I think). It can be seen extra well on spaniels and such breeds. This is a hunting dog, like I said, they have it too. Make a very small bump right above/behind the ear, and continue to make a nice slightly bent line down, until you come to the whithers (shoulders). Now, let's change that line. We're moving closer to the back, so your line should be changing direction too. Well wait with drawing the rest of the back. I think it's easier to do that part later, when we are working with the tail...
Step
4
How's it going? Well, I hope ^^
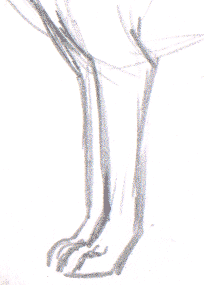
Now we'll draw the front legs. Now,
remember this: Dog legs are not shaped like poles - they have angles and are
bent and stuff like that :> I could really recommend to check out some dog
anatomy in a book - do you have any idea how much easier it becomes to draw an
animal if you know what's under the skin?
Begin at the upper arm (where the
helpline starts, about the same height as the brisket. Go down - back until you
reach the chest line. Now, go straight down until you reach the knee. Remember,
a dog's knee is much lower than a human's! Now, go forward - down instead. Not
too much, though, or your dog will get a weak pastern, which we don't want! Now,
draw the paw. Paws are sort of round, with short toes. Don't worry about the
details, we will make those later.
Continue back up, until you reach the chest again. Draw the elbow here. You mark it by drawing a tiny triangle-thingie. Not too hard, was it? Let's draw another leg behind the first one! After all, most dogs have four legs! Simply go to the left side of the leg, and follow the lines you already did. There. Two front legs!
Step
5
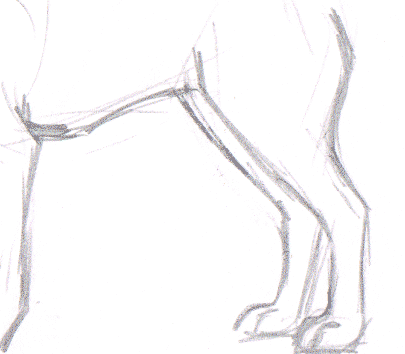
Next up: the belly! This being a healthy hound, its belly will
not be hanging, instead it will go upwards, until we reach the hind leg. It's
not hard. Just begin behind the elbow, and draw a line that, about when you have
reached halfway, start to go upwards. Not too much though! Gently, slowly...
There you go. Oh yeah. And if you're drawing a realistic male dog, you might
want to add some... er... body parts here... But I'm drawing a bitch this time
XD
Now, let's move on to the hind legs. These legs have more muscle and are thicker than the frontlegs. They are also bent more. Follow me now... Start slightly above where the belly ended, and draw down - right until you reach the knee, which is placed high on the hind legs. After that, draw a lot "sharper" down and back, until you reach just below the hocks. This is actually the dog's heel! Now, go straight down until it's time for the paw. Halfway done! Continue up to the hock, and then draw back, towards the knee, and once you get to that height, draw up and out again. Finally, when you reach the end of the thigh and is close to the dog's body, draw inwards. This is where the legs ends. Congratulations! Now, just like before, draw another leg.
Step
6
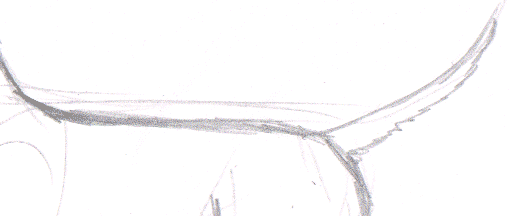
There's not much left now on the basic drawing! Go back to the
whithers. Now, draw a rather straight line towards the butt. But change the line
just slightly when you reach where the pelvis would be placed be this a real
dog. Make it go down just a little, and when reaching the croup, where the tail
begins, go down just a little bit. Then, let's draw the tail itself. Hounds
often have slightly longer fur on their tails - let's draw that! Make the tail
as long or short as you want. Coonhounds have long tails, scandinavian hounds
(which is what I'm drawing) have shorter.
A tail gradually grows
thinner as it reaches the tip, and is at its thickest by the croup. Remember
that.
Step 7
Now,
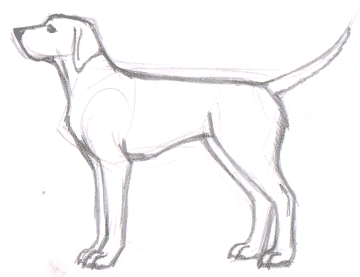
let's move on to the details! We'll begin at the head! Begin on the top of the
muzzle, and draw the outline there. When you reach the eye, you might want to
define an eyebrow. Continue up, and draw the top of the head. Now we're gonna
draw the details in the eyes! You usually can't see much of the eye's white on a
dog, but there is usually a white hightlight in the eye, which you want to have
on this drawing. Since this drawing isn't big enough to allow a lot of colour, I basically just coloured the eye black with a white highlight. Colour the
nose black, and we'll continue down to the throat. Now, draw a line of fur here,
to show that it's loose skin, not a very thick neck that we're seeing. Go down
to the paws, and draw small claws and hint that there are pawpads underneath. Go
to the hind legs, and do the same here. At the hock, draw a line like the pic
shows. This works sort of like the ear line - and dogs have an easy-to-feel bone
there and a "hole" in the leg covered with skin and fur. Feel on a
(short-haired) dog's leg, and you'll see what I mean.
I've also worked on the lines a little, to connect them better. Nothing major :)
Well, your drawing is basically done now. If you want to add muscles and stuff, you can do so below in the "over-course". Same goes for colour. But you have successfully drawn a hound by now. Congratulations! Remember, if you're not happy with the result - try again! Pratice is the key to success. I draw lots of sketches every day to become better. Save some of your currents sketches somewhere where you won't see them, and continue to draw and pratice. In, let's say... 6 months, take out your old sketches, and compare them with how you draw then. You might be surprised at how much better you've gotten by practicing and reading about dog anatomy *wink wink*.
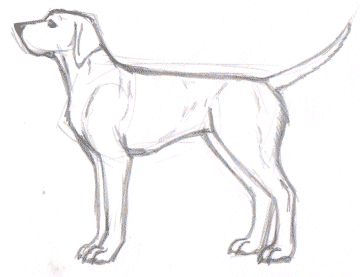
Step 8 -
"over-course"
This is the second to last step, and not necessary for
drawing. Here, I'll simply define some simple muscle-hints that you can add to
your drawing. I can't tell you all about muscles and stuff, instead I recommend
to visit a library or a book shop and get your hands on a book on dog anatomy!
It really helps, and a book is great reference when drawing!
Alright, above I've hinted some muscles on my dog. These are the major outer muscles that you can see on some drawing of short haired breeds. On long haired breeds, the easiest part to hint muscles is by hinting it with the fur. I drew the muscles slightly "over visible" as I was afraid the scanner wouldn't see them...
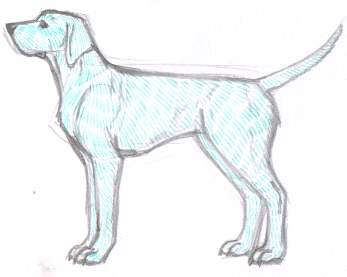
Step 9 -
"over-course"
Alright, the last thing you might want to do with a drawing
is to colour it. I won't colour this drawing, instead I've helped you by drawing
lines that shows the direction of the fur on a dog. This is very important if
you want your dog to look realistic when colouring by hand! See how the lines
goes, follow them when you draw, and look up the colour you want to use... You
might want to read the breed standard of the breed you're drawing to see what
colours are okay and what are not... and then get to work! Remember to put on
some shadow and hightlights. It's not all that hard. Just decide where you want
the light to come from on your drawing. From above, for example. If so, simply
but shadow everywhere the light doesn't fall - the underside, behind the ears,
the throat... Try different styles, and see what you like best :)
If you want more info on how to draw dogs, I will tell you what I tell everyone who asks: Read books, ask those who know, read tutorials on the net, and most important of all: study real dogs!
![]()